Lab 04 - Camera: Cones detection
Robotics II
Poznan University of Technology, Institute of Robotics and Machine Intelligence
![]()
Laboratory 4: Cones detection and classification using Camera sensor
Back to the course table of contents
In this course, you will train an object detection and classification algorithm. Your object will be a cone.

Part I - train the cone detector
First, follow the interactive
tutorial. It uses the YOLOv8 model for object detection and the BME
Formula Racing Team cones dataset. Remember to save exported onnx model
from the final step. At the end, you must have:
best.onnx
Part II - build the inference pipeline
In this part, the trained model is integrated into a ROS 2-based perception pipeline.
First, the exported ONNX model should be copied into the ROS 2 workspace, for example:
/ros2_ws/src/rob2_pkg/onnx/best.onnxAfter that, you should review the implementation of the detection node responsible for:
- subscribing to the camera topic,
- preprocessing incoming images,
- running inference using the ONNX model,
- postprocessing the outputs,
- publishing the results.
The camera topic used in this laboratory is:
/fsds/cam1/image_colorPreprocessing
The neural network requires input data in a specific format. You must ensure that the preprocessing stage performs the following steps:
- resizing the image to the required input size (e.g., 640×640),
- converting the image representation from HWC (height, width, channels) to CHW,
- changing the color format from BGR to RGB,
- normalizing pixel values to the range ⟨0,1⟩,
- converting the data type to float32,
- adding a batch dimension (e.g., from (3,640,640) to (1,3,640,640)).
Postprocessing
After running inference, the model outputs must be interpreted. This includes:
- extracting bounding boxes,
- determining class labels,
- computing confidence scores,
- filtering detections using a confidence threshold,
- optionally applying Non-Maximum Suppression (NMS).
The final step is to visualize detections by drawing bounding boxes and labels on the image.
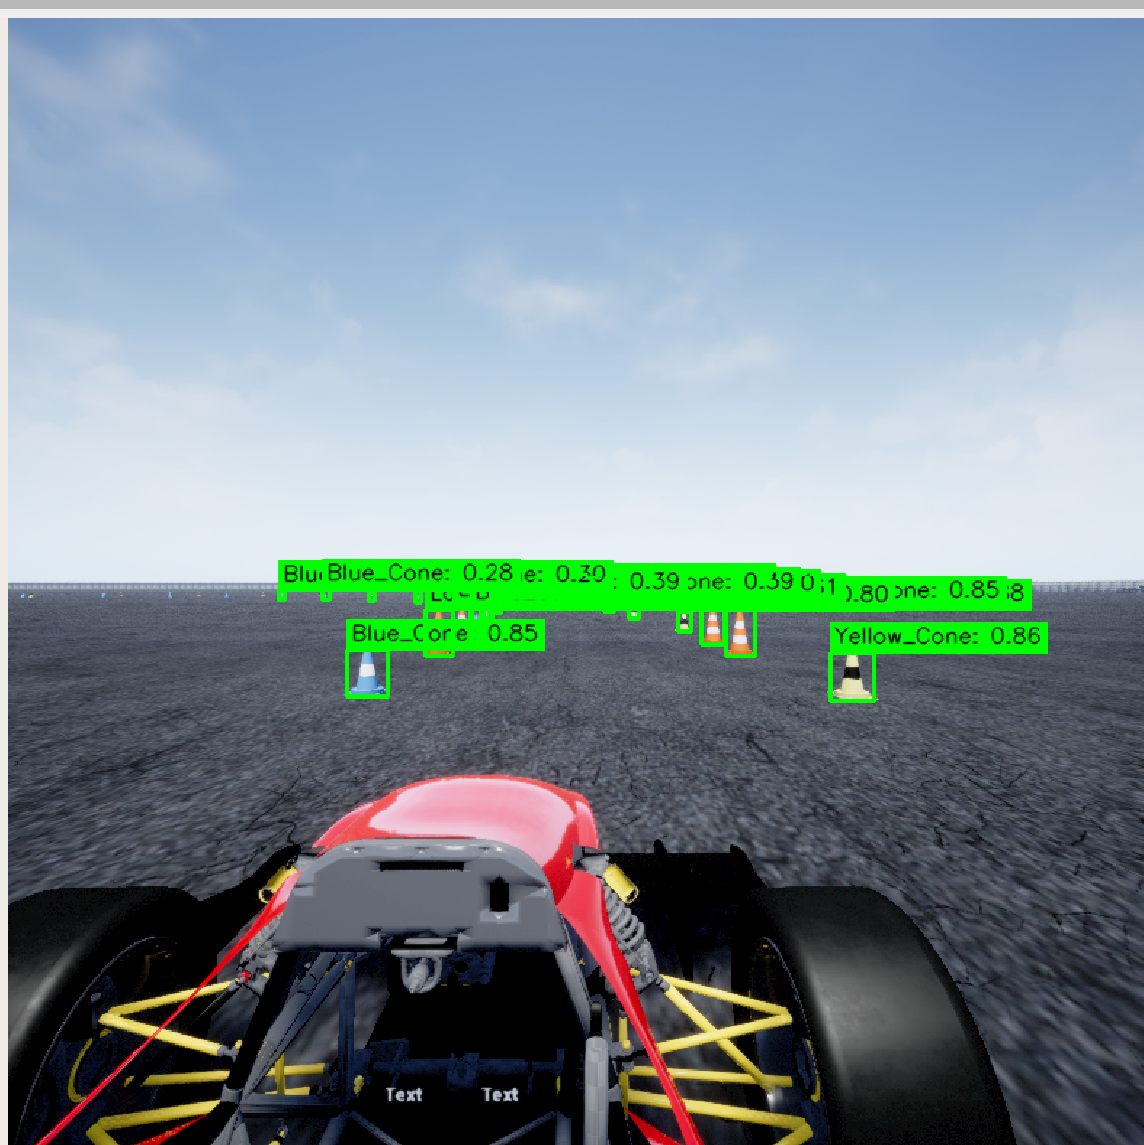
As a result: - .txt file with short question answers, - upload your node responsible for inference, - upload screenshot from the rviz2 tool to the eKursy platform.